 |
| Looooooooading |
 |
| Loaded and ready for action Boom! there it is! |
 |
| Barely used half of these |
The Marquee Tool acts like a shape tool really, allows you to select content of a layer much like the selection tool in MS Paint.
The Lasso Tool is the same as the Marquee Tool, only it allows you to draw selections freehandedly. This is useful for if you want to select something complex and not of a basic shape.
The Wand Tool lets you select within the confines of edges, the amount it selects can be defined by the tolerance meter which appears on the bar at the top once you've selected the tool.
The Crop Tool allows you to cut the canvas (whole image) down to the desired size.
The Eyedropper Tool lets you take a sample of a particular colour to replace the current colour in your swatch. This makes it easy to switch between colours, and speeds up the process of whatever your doing.
Healing Brushes and the Patch Tool are ones I used in my project, and they're used for covering up and fixing.
The Brush Tool is your paintbrush, when selected, options for brush head type and size appear on the bar at the top.
The Stamp Tool allows you to take a sample of a layer, then 'paint' it at another location on the canvas.
The History Brush Tool acts as a kind of eraser tool, only it rubs out the image and replaces it with what colour is underneath.
The Eraser Tool does what it says on the tin. It rubs out stuff.
The Gradient Tool allows you to create a gradient in the colour of your current swatch. The Paint Bucket Tool completely fills in a layer with your colour swatch.
The Blur/Smudge Tool makes what your using the tool on go all smudgy.
Dodge/Burn tool makes the colours go funny.
The Pen tool allows you to create a freehand straight line, which allows you to curve at the edges.
The Text Tool allows you to create text.
Selection Tool allows selection.
Shape Tool allows you to create shapes.
3D Tool means you can create 3D stuff.
3D Camera Tool means you can look around the 3D stuff.
The Hand Tool lets you move around the layer.
The Zoom Tool lets you zoom in or out of the image.
 |
| Or you could do the keyboard shortcut Ctrl+O |
You can create a new document by selecting new, but in this tutorial, i'm going to be using a document that already exists.
 |
| Lots of files! All the photos I took |
 |
| For this tutorial I used the image that appears on my front cover. On the magazine, I flipped it horizontally. |
 |
| Not everyone does this, but I find it's handy to have a spare original layer hanging around. |
 |
| Next up is to duplicate it. |

 |
| I then make the bottom layer non visible by clicking the little eye picture. This helps prevent confusion in the long run. |
 |
| Yeehaw! |
 |
| Just quickly using it in this tutorial, nothing too neat. |
 |
| AH CHOOO! |
 |
| Fixed! |
 |
| Ready for deleting. |

 |
| Rough around the edges, but it was a quicky. |
 |
| The quick selection tool can also be used for the cutting of the outside, i just find the magnetic lasso does a better job. |
 To get rid of that triangle of background, I use the Quick Selection Tool.
I click and drag inside the triangle, and it automatically selects it.
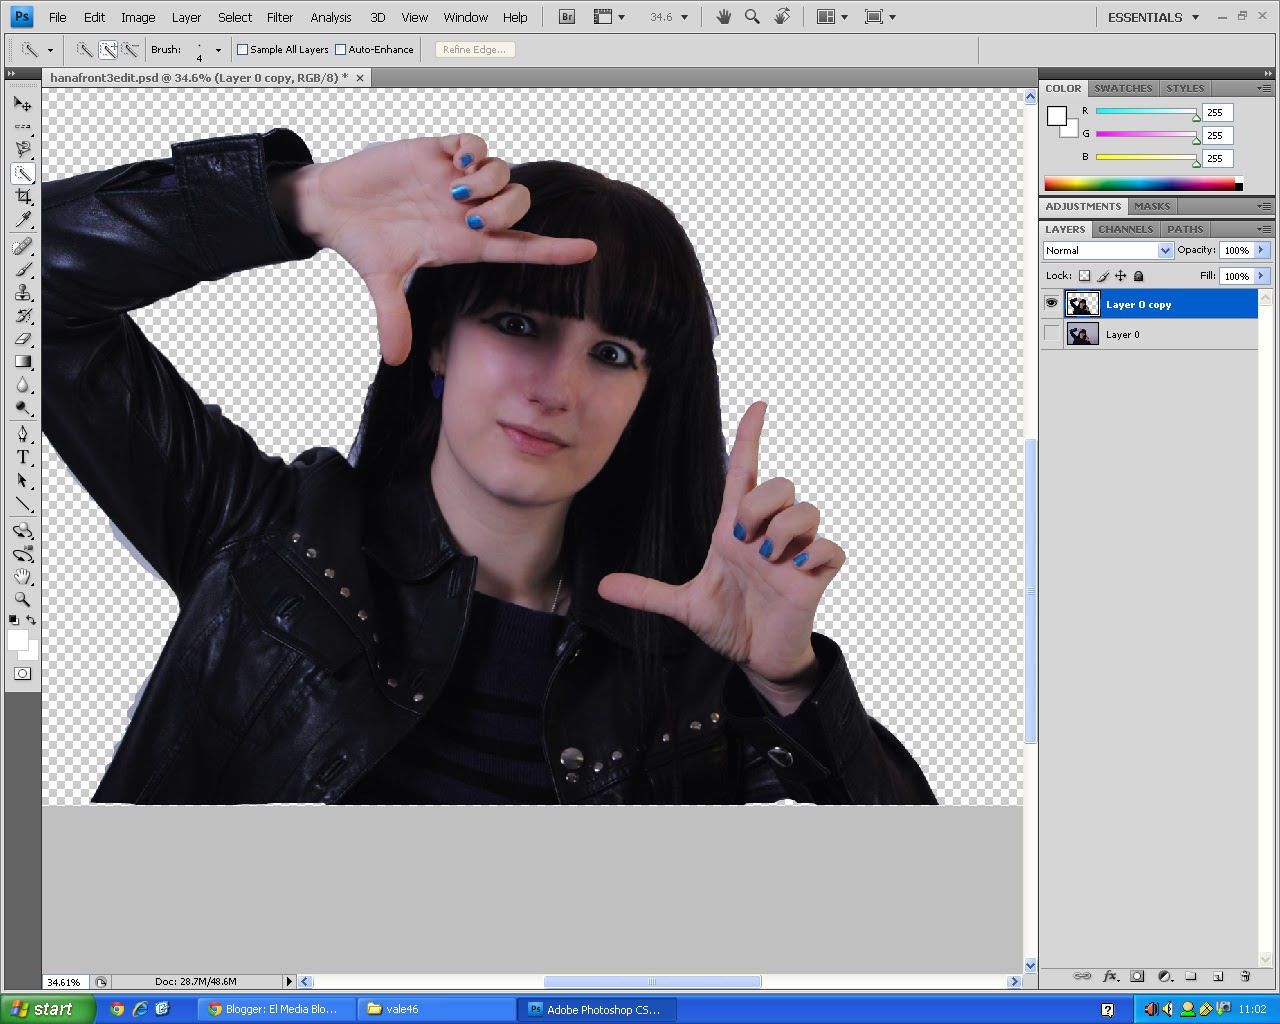 A quick press of delete and it's all good! I then deselected the selection by using Ctrl+D.
You can now go round the edges with the eraser Tool to neaten it, using a layer of colour behind (inbetween layer0 and layer0 copy) the top layer can help see the edges more clearly.
No comments:
Post a Comment